|
| Kaiyi, 2-103 Story: "I love swimming in the pool" How colors were used to show this: "I used different colors of blue to show the surface and the deep end of the pool" How lines were used to show this: "I drew straight lines to show my hair" One thing I did with my oil pastels was: "I smudged different blues to show the pool" |
One of the first units I do every year with second grade is a drawing unit. My curriculum closely follows the NYC Visual Art Standards (The Blueprint for Teaching and Learning) and the 2nd Grade Performance Indicator for Drawing states that students should be able to create a drawing that demonstrates "experimentation with various drawing tools such as, oil pastels, pencils, colored pencils and crayons" and "use of varied lines and colors to convey expression". The suggested theme is a "family portrait with attention to physical features". This year I chose to have students create only one portrait (self) with the goal that they would learn to observe, in an in-depth way, the features in their own face and how to represent their observations through line, color and shape with drawing materials on paper. I know that at this age students are exploring the world around them and they love to tell stories based on these explorations and observations. For this reason, I chose to have students create narrative self-portraits, which required them to chose one story or fact about themselves that they wished to convey through their portrait.
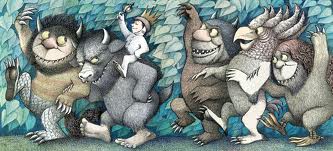
I began the unit by giving students a chance to explore the material they would use for the portraits, which was oil pastel. By offering students the ability to have hands-on, exploration based experiences with the oil pastels, I knew they would then have a better understanding of how they might express themselves (and their story) through the material. Students learned they could color smoothly with the oil pastels, but could layer, smudge, mix and scratch the oil pastels as well. After this, I showed students several artists that have created narrative self-portraits (a great resource is the book, "Just Like Me: Stories and Self-Portraits by Fourteen Artists", edited by Harriet Rohmer, which not only has fabulous portraits by various artists, but it also has statements from the artists explaining their narrative portraits). Using a document camera, I took photos of the portraits and displayed them on my SMARTboard. Recently, I have been using the "Feldman's Method of Art Analysis" for looking at work with students and I adapt it based on the age/ability of each class (an overview can be found here: http://itismath.com/wp-content/uploads/2011/09/Feldmans-method.pdf). I asked students to describe what they saw, analyze based on the art elements (eg., colors, shapes, lines, etc.), interpret the art (i.e., what story/information is this artist telling us through their portrait? how do we know?) and then judge (i.e., what do you like about this drawing? if I could ask this artist a question about their art, I would ask...., etc.).
 |
| Joe.Sam |
 |
| Maya Christina Gonzalez |
Next, students brainstormed the story (or information about themselves) they wanted to share with others through their portrait (e.g., the time I got my white belt in Karate, my friend and I once went to the park together, I love to bake, etc.).
 |
| Kaiyi, 2-103 |
After this, students spent several weeks working from observation (using mirrors) to create their portraits with oil pastels. We observed and discussed our skin colors (e.g., light chocolate brown, tan, pinky peach, cinnamon, peanut butter, etc.) and how we might mix/layer/smudge together a variety of colors with oil pastels to create our own unique skin tone. Students also considered their background and how they could further portray their story/information in the background. Students finished their drawings by creating details and texture with ebony pencils and scratch (sgraffito) sticks.
At the end of the unit, students shared their portraits with classmates and reflected on their process by writing about what story/information they wanted to share via their portraits, lines and colors they used to convey this and how they used oil pastels in their drawing. I did this in order to reinforce learning for students, but also to help me assess students' understanding of their artistic process.
The finished portraits:
 |
| Konnor, 2-103 Story: "I am telling that I am sad because I can't go to the playground" How colors were used to show this: "Blue to show tears coming from my eye" How lines were used to show this: "I used straight lines for the tears" One thing I did with my oil pastels was: "I colored smoothly for my playground" |
 |
| John, 2-103 Story: "I am telling that I am a champion" How colors were used to show this: "I used gold to make it look like a sunny day so they think I won on a sunny day" How lines were used to show this: "I used straight lines to show my skin" One thing I did with my oil pastels was: "I layered some colors on my left cheek because it's a tiny bit darker" |
 |
| Liani, 2-103 Story: "I love to take my dog on a walk" How colors were used to show this: "I used green for the tree and yellow for the sun" How lines were used to show this: "I did a V on the tree for the trunk" One thing I did with my oil pastels was: "I used a sgraffito stick for the leaves on the tree" |
 |
| Jonathan, 2-103 Story: "I am on a roller coaster" How colors were used to show this: "I used pink for my cheeks because I am scared" How lines were used to show this: "I used straight lines" One thing I did with my oil pastels was: "I layered a bunch of colors" |
 |
| Alanie, 2-103 Story: "I am trying to tell that I love dogs" How colors were used to show this: "I used pink for the background because I love pink and I love dogs " How lines were used to show this: "I used straight lines, also curvy ones. Zig Zags for the noise of the dog barking" One thing I did with my oil pastels was: "I smudged in art" |
 |
| Natalie, 2-103 Story: "I am walking a pet bunny in the park" How colors were used to show this: "I used different colors for my self-portrait like blue, green, brown and red" How lines were used to show this: "I drew straight and long" One thing I did with my oil pastels was: "I used oil pastels in the sky, sun, and face " |
 |
| Leonardo, 2-103 Story: "I'm mad because I lost in a battle but I won first place (in karate)" How colors were used to show this: "I used electric blue on the blue belt" How lines were used to show this: "I used zig zag on my hair " One thing I did with my oil pastels was: "I learned to smudge" |
 |
| Tiana, 2-103 Story: "I am happy that I am outside" How colors were used to show this: "I used colors like blue to show the sky, the background I am in" How lines were used to show this: "I used straight lines to show my hair was straight" One thing I did with my oil pastels was: "I used a oil pastel for my shirt" |
 |
| Joshua, 2-103 Story: "I like having picnics" How colors were used to show this: "I used black to tell it is in the night" How lines were used to show this: "I used thick lines for my old necklace" One thing I did with my oil pastels was: "I learned to layer and sgraffito scratch" |
 |
| Jaydiluz, 2-212 Story: "I'm in my room" How colors were used to show this: "I used pink to show I was sitting in my room" How lines were used to show this: "I used scratch lines in my hair" One thing I did with my oil pastels was: "I did this to show I was in my room" |
 |
| Angela, 2-212 Story: "I tell a story about butterflies" How colors were used to show this: "I used pink because it is my favorite color" How lines were used to show this: "I used bumpy lines" One thing I did with my oil pastels was: "I used color with oil pastels to show colors" |
 |
| Justin, 2-212 Story: "I tell in my story I got punched in the face" How colors were used to show this: "I used red for my eye because I got punched" How lines were used to show this: "I used a straight line for the grass" One thing I did with my oil pastels was: "I smudged" |