Wednesday, November 30, 2011

2nd Grade Oil Pastel Portraits of "Me + My Hero"

2nd Graders have been working on a drawing unit based on the Blueprint Standards for Visual Arts (the NYC art standards). The benchmark for 2nd grade states that students should be able to "create a drawing that demonstrates experimentation with various drawing tools such as oil pastels, pencils, colored pencils and crayons and also demonstrates use of varied lines and colors to convey expression". The suggested theme is "a family portrait with attention to physical features".
I started the unit by doing an oil pastel exploration with students, as I always feel an exploration with materials is necessary for students at the beginning of any unit. I could teach them techniques as they created a final drawing (and I do to some extent), but I feel the learning they gain from just exploring the materials is much richer, as well as more beneficial. I want students to focus on the process, not the end product, and I feel that doing an exploration also helps with that.

The exploration I did with students began with a class discussion in which they learned how oil pastels can be manipulated in a variety of ways (smudging, layering, mixing, scratching, etc.). Students were then given a square piece of white paper that they folded twice, so that the paper  was left with four squares. Inside each square, students explored the techniques they learned about in the class discussion.

Jean, 2-216
Eny, 2-225
Emily, 2-216
After this, students looked at the work of Frida Kahlo and discussed the portraits she created; students learned that a portrait is a work of art that depicts a person, usually the head, neck, and shoulders with a focus on the facial expression of the person. . We learned that Frida often created portraits of loved ones, as well as people that were her heroes (like her doctor).
"Self-Portrait with the Portrait of Doctor Farill, Frida Kahlo, from the website wikipaintings.org

We then made a list of who our heroes were and students filled out a worksheet to describe/sketch their hero.

Jason, 2-216, He chose me as his hero :)

Once students had decided on their hero, they started working on their portraits of themselves with their hero. Students began in oil pastel, lightly drawing in their own portrait from observation using a mirror. We talked about how we might arrange the space inside the page so that we could fit in our hero as well. We also talked about how our hero might be taller than us, so we might need to draw our own heads further down on the page so the hero could take up more of the page and appear bigger. Students began by creating the shape of their portrait, then blended oil pastels to create their skin tones. After this, they created basic facial features in oil pastel. Once their own portraits were mostly complete, they added their hero's portrait by using a picture of their hero as reference (either a photo or a printed picture they each brought in as homework). Once both portraits were complete, students thought about where they might go with their hero and created a background that conveyed this. Finally, students used ebony pencil and sgraffito (with scratch sticks) to add details (like texture in hair, eye lashes, lines in lips, etc.).

Work in progress:
Annaya, 2-225

Yujia, 2-225

Yahay, 2-225

Steve, 2-216

Jason, 2-216, "My hero is Ms. Westerberg because she teaches me art in class"
Finished Artwork:
Dylan, 2-216, "My hero is David Wright from the Mets because he always hits home runs"


Raul, 2-216, "My hero is my Sister because she almost did a split in the blizzard"

Rosalia, 2-216, "My hero is my mother because she always helps me with my homework"

Stacey, 2-216, "My hero is my mom because I love her and if somebody robs me she will get them"

Yannae, 2-216
"My Hero is a Doctor", Nathaly, 2-225

"My Hero is a Doctor", Yujia, 2-225

"My Hero is a Firefighter", Francisco, 2-225

"My Hero is a Firefighter", Kimberly, 2-225

"My Hero is my Brother", Helen, 2-225

"My Hero is my Dad", Angel, 2-225

"My Hero is my Dad", Nayeli, 2-225

"My Hero is my Mom", Annaya, 2-225

"My Hero is my Mom", Luis, 2-225

"My Hero is my Mom", Sabrina, 2-225

"My Hero is my Mom", Yahya, 2-225

"My Hero is my Sister", Yamilet, 2-225

Wednesday, November 23, 2011

4th Grade Oil Pastel Explorations

4th Graders have been working on an oil pastel unit. We started by exploring oil pastels and learning about the various ways we can manipulate them (i.e., smoosh, layer, blend, scratch, etc.). Students looked at abstract art and thought about how they might make an abstract composition using color, line and shape. 
Sonia Delaunay, "Electric Prisms" (from http://www.artexpertswebsite.com/pages/artists/orphism.php)
Students started by drawing a variety of intersecting lines in black and white oil pastel on colored pieces of paper. These intersecting lines created shapes. After a discussion of value, students manipulated black and white oil pastels in a variety of ways (i.e., blending, layering, etc.) to create value inside their shapes.
Elijah, 4-331

The following week, students learned to blend color into their black and white shapes.
Braulio, 4-301

Emily, 4-301

Richard, 4-301


Students will use the knowledge they gained during the exploration lessons (i.e., how to manipulate the oil pastels, how to create value and texture, etc.) to help inform their decisions when they create their final drawings. Be on the look out for a future post showcasing their final projects...

Monday, November 21, 2011

1st Grade Collage Unit

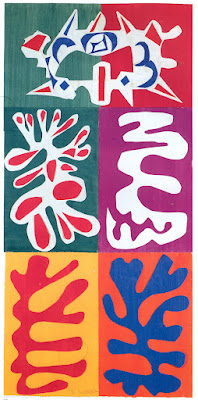
Students in first grade have been busy working on a collage unit. They started by learning about the collages of French artist, Henri Matisse. We started by looking at his collage, "The Snail" from his era of "paper cutouts" or collages. 
"The Snail", Henri Matisse

We discussed what he might have used to make this picture, how he might have done it (overlapping, layering, placement, etc.) and what it might be a picture of. We then spent the day exploring ways we might change paper with our own hands (using colored construction paper). We learned we can tear and rip paper into a variety of sizes and shapes, and then use glue to create a picture. It was a day of pure exploration, so students were free to create a collage of whatever they wished. The following week, we looked at some more cutouts by Henri Matisse and discussed the way he "drew with scissors" to create a variety of interesting edges (smooth, bumpy, zig-zagged, etc.) and shapes.
"Panel With Mask", Matisse
Students then added to their exploratory collages from the week before by changing paper with scissors and then placing pieces on top of their existing collages (via layering, overlapping, etc.). The results were as varied and unique as each child that made them. 

Brayden, 1-105

Kiara, 1-125

Vanessa, 1-125

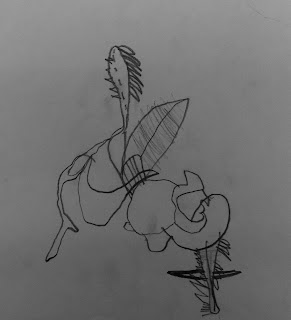
After students had finished their two weeks of exploring collage, we switched gears to discuss working from observation, instead of from imagination. We discussed looking at flowers, in particular, and spent time looking and observing the different parts of the flowers. We learned how all flowers have stems, petals, and leaves, the way these look (size, color, shape, etc.) can very greatly from flower to flower. Students then practiced looking at flowers from observation and sketching what they saw using an ebony pencil. We tried to draw the different shapes and lines we saw, as well as some of the textures.

Carol, 1-106
Natasha, 1-106
Jaeden, 1-106
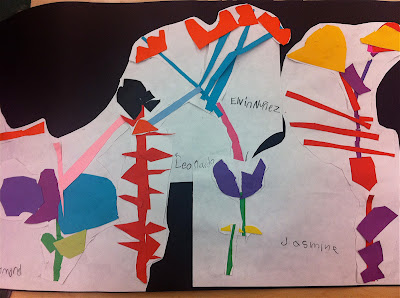
After this, students began their final collages. They spent the next 2-3 weeks creating collages of the flowers from observation, using the skills they honed during their week of drawing. Students discussed lines and shapes they had created in pencil, and how they might "draw" these lines and shapes with their scissors. They also discussed how they might rip and cut small parts, then layer and overlap these parts to create the shapes in the flowers they were observing. Once their flowers were more or less finished, students then cut out their flowers from the white background paper. 


During our final session together, we discussed murals and came up with ideas for how we might make murals using our flower collages. Students then worked together to arrange place their flowers on large pieces of paper (with glue) to create class "gardens". These murals are now installed on the first floor hallway.


Great job first grade!!

Welcome!

Welcome to PS 250's Art Studio Blog. Let me introduce myself and my artists....

I am the art teacher, Ms. Westerberg, and I am in my fourth year at the school. Before coming to PS 250, I was in the graduate program at Teachers College, where I received my Masters in Art and Art Education.

                                                 Me as a Kindergartener...I have always loved art!


Our school is in the East Williamsburg section of Brooklyn. We have about 750 students, mainly from Hispanic and Asian descent (a vast majority of our students are immigrants or from families of immigrants). Because of the diverse backgrounds our students come from, there are many exciting opportunities for integrating their heritage into school projects (especially the arts!). Also, we recently received a Magnet grant so we are now a Magnet School for Communications and Media Arts. Our Arts team includes myself (Visual Arts), as well as a music teacher, Ms. Michalina Trucker, and a drama teacher, Mrs. Deena Cassidy. We also have many enrichment programs that come into the school. During the past three years, we had a partnership with Studio In A School and were part of the Collaborative Community Initiative (http://studioinaschool.org/programs_cc.php), which meant our school was a model site for integrating the Blueprint for Visual Arts (the NYC Visual Arts Standards) into the school's curriculum.


As a way of sharing with parents, the school community, and the arts education community at large, I will be posting projects as we work on them. Check back frequently to see what our student artists create next!